Showing posts with label enamel. Show all posts

Sunday, 12 April 2015

Metalwork: Enamelling on copper


I decided to try using my hot shop colour powders on copper, as I know that copper and glasma have very similar coefficients of expansion, and so can be used together. The problem I was most worried about was it not sticking to the copper. to combat this I thoroughly cleaned the copper so there were no contaminants on the surface. I was right to worry, as my first attempt was unsuccessful, the enamel flaking off the surface soon after it cooled. I thought this was due to the copper building up a layer of oxide, and the powder stuck to that instead of the copper itself. I then thought that to combat this I could use borax flux to stop the oxide building up (flux is what keeps the metal clean and enables solder to stick to it). I first mixed the powder with water and flux and painted it on to the copper.
 I heated up the piece from underneath (to heat the copper rather than the enamel) and the flux bubbled up. I liked the effect this gave, as it moved the powder out of a flat layer and into a very interesting texture.
 I then tried putting the flux on and heating that until it bubbled up, then added the colour powder, this gave a more even layer, though it still kept an interesting texture I think these effects could both be used in future pieces.
I then used enamels that are designed for use in a kiln on sheet glass, which have a lower melting temperature. I textured the copper in the rolling mill then painted on the enamel and heated it with a blowtorch from underneath.


 These stuck without flux, and stayed where I painted them on, so were a lot more controllable, but not as textured as the powder pieces.


Wednesday, 10 July 2013

Folded squares: Making jewellery

I started by setting out my copper squares with other types of squares to spell out words. I decided to use tin plate steel to make some squares, and I acid etched one side, so the inside was different when folded. I spelled out the word 'hide' using the braille alphabet
 I then decided to try some clay squares using the same folding method, but I found these were more curved because of the nature of the clay. I enameled the clay to show the cross pattern more clearly. I had to try to make the clay squares the same size as the metal ones, and this was fairly difficult because clay bends in a different way to metal, and it also shrinks during firing.
 I then decided that it would be better if there was a colour scheme, so it wasn't just random, so I decided to take the warm colours from the copper and brass, and use enamels in these colours on the clay squares.
 The clay squares on this one spell out 'unnoticed'. I stuck the squares together with masking tape to make sure they were lined up, before sewing them onto a fabric base. I stitched wadding inside the fabric, to make a padded base. I then sewed the edges together, to create a cuff.
 I tried to make the stitching as invisible as possible, so the pattern wasn't interrupted by the seam.


I used the same method to make two other pieces, a bracelet and a necklace, spelling out 'hide' and 'observe'


Metalwork: More enamel.

I really liked the effect of the enamel in folded copper squares, so I decided to make some more, to place in a grid, so that they create a pattern together
I might also try hiding a pattern in this pattern, possibly having a few squares different, maybe brass or a different technique.

Monday, 20 May 2013

Metalwork: Folding and using enamel

I started looking at how I could create some of the patterns I have been looking at, in a more three dimensional way, and experimenting more with materials instead of designing something and then making it. I wanted to try different techniques of making pattern and furthering my ideas that way, before deciding what jewellery or object the piece will be. I started looking at origami folding techniques, and looked at a jeweller, Lois Martens, who uses folding in her silversmithing.

I then started experimenting with folding copper, and I found a shape I liked, which had a cross shape through it.

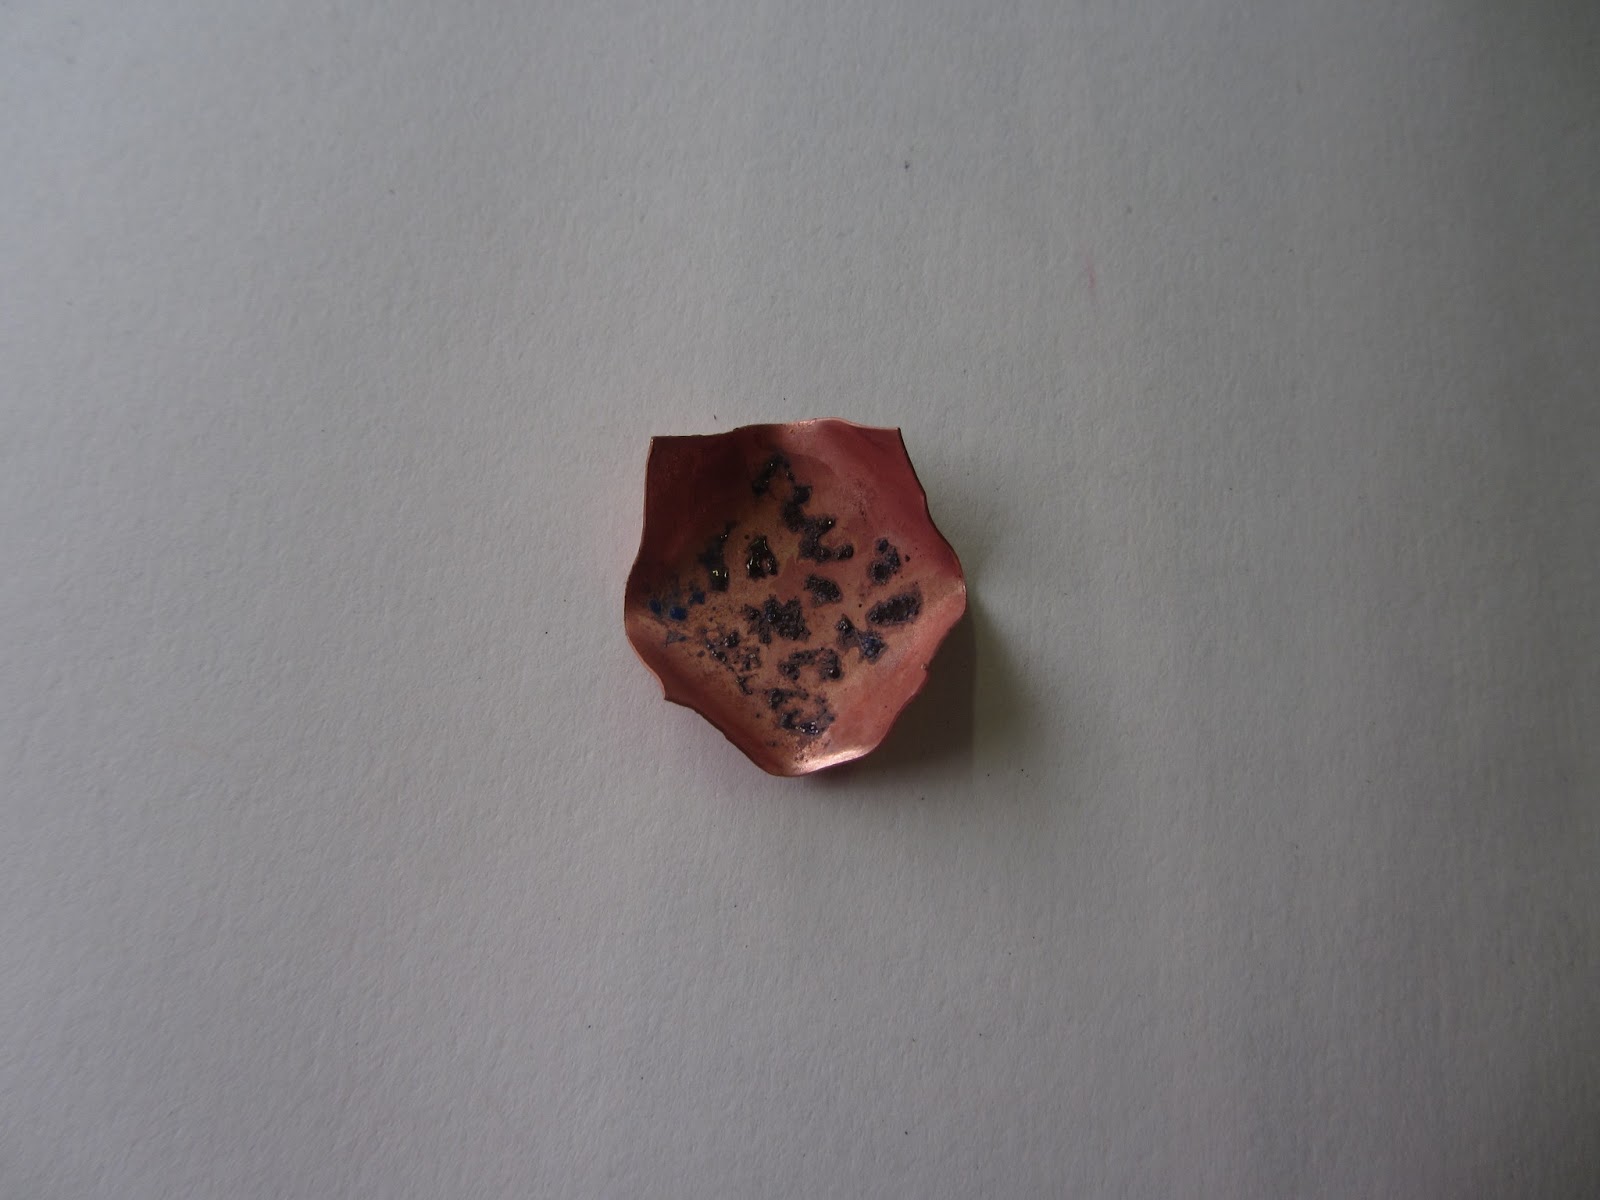
I then started thinking about how I could possibly decorate it, on the inside, so the pattern is only visible through the cross shape, I first thought about putting pattern onto the metal, before I folded it completely. I decided to try some enamel, but I only put it on the square part that shows through the cross.
I thought this worked very well, and was a good way of putting patterns directly onto the metal. I also tried putting paper squares into them with pattern on, and I found that looked good, but I think I would prefer a more intricate pattern on the paper, if it were to be made into a piece of jewellery.
I then decided to try some more enameling, because I think it has a texture and shine that contrasts well with the copper. I tried both putting pattern in the enamel, and some plainer ones, where I focussed on colour, rather than a regular pattern.

 To do this, I mixed the enamel with a little bit of water (keeping each colour separate) and used it like paint onto the copper. I did this with six copper squares, and left them for the water to dry before I heated them. The water has to completely dry out before heating, otherwise it would boil, and could cause the enamel to come off the piece. I used a blowtorch to heat each square until the enamel melted and went smooth and shiny.
I like using enamel because it changes when it is heated, and I find it very interesting to see how they look afterwards.
I folded the edges in before I put the pieces in the acid to get rid of the oxide on the copper.
I then put them together in a regular grid, so that it created another pattern of where the sides meet, and create little diamonds in a regular geometric pattern.


Wednesday, 6 March 2013

Ceramics: Using marbles and enamel


I wanted to use other materials with my ceramics, so I used some of my marbles to put into circles and squares of clay, so that when they were fired the marbles would melt. As the glass cools at a different rate to clay, some of the marbles had cracked inside, which I think makes a very decorative effect. I also used some of the objects I have collected to make imprints in the clay. I then used enamel to add colour to some of the imprints. I added these clay pieces to the metal and recycled squares and circles I had made, to make a small collection of each.


Thursday, 17 January 2013

Metalwork: Recycling a cat food can

 I decided to use empty washed out cat-food cans, because we have four cats, so the cans are readily available  and are always just put in the recycling bin, so I wanted to use them to make something new. After looking at leaves, I decided to use the ridges that go around the can for the veins of the leaves. I cut diagonally across the ridges of the can, then cut out the two halves of the leaf. 

I used a punch and a hammer to make holes in either side of the leaf, then used wire to attach them together neatly. I made three leaves in this way, and when they are all put together I think they would make a nice necklace, or brooch.


 Next I used the base of the can, which is thicker than the sides and has circular grooves, and put enamel powder into the centre circle and put it into the enamel kiln.
 When I took it out and it cooled, I made a copper wire flower shape, based on the centre of the pink flower, and put it onto the enamel, then put it back into the kiln to melt the enamel again, so the wire would sink into it and would hold  it firmly. I then used white enamel powder around the wire part, so a little bit of the yellow was still visible through it.

 I wanted to also colour the outer grooves, but not to cover up the whole of the surface, because I wanted it to have the mix of old metal with new enamel. I used white and red enamel because there was no pink, and think it has worked well. I have not used enamel before this, and think my outcome is very successful in showing the mix of old with new, and also making a new object from an old one. This could be used as a decorative object on its own, or could be made into a brooch or necklace.

I then tried to make something from a can base that didn't include using any new materials, so I decided to use some paper clips and a drawing pin, to add to the can as decoration. I think this worked well because all of the materials are shiny metal, and are designed to be functional not decorative so using them in this way is interesting. I have bent the paper clips so they look like the flower petals, and also used shears to cut the edge into petal shapes.