Showing posts with label brass. Show all posts

Tuesday, 19 November 2013

Metalwork: Sinking a shallow bowl

Sinking is a method of creating a shallow bowl shape from a flat disk of metal, by hammering it against a dipped surface to shape it. I worked in concentric circles from near the edge to the centre, which stretches the metal in the middle and makes the dish shape.
this gives a good overall bowl shape, but leaves a very lumpy texture from the hammer.
once I was happy with the shape of my bowl and I had got it as deep as I wanted it, I started planishing it to create a smooth texture, but one which would still have hammer marks on. I used a round stake and  a flat, shiny hammer, which meant the marks it left were shiny and even.
I used the same method of concentric circles to do this, so it would be even and wouldn't be misshaped.


Monday, 14 October 2013

Metalwork: Soldering and decorating the ring

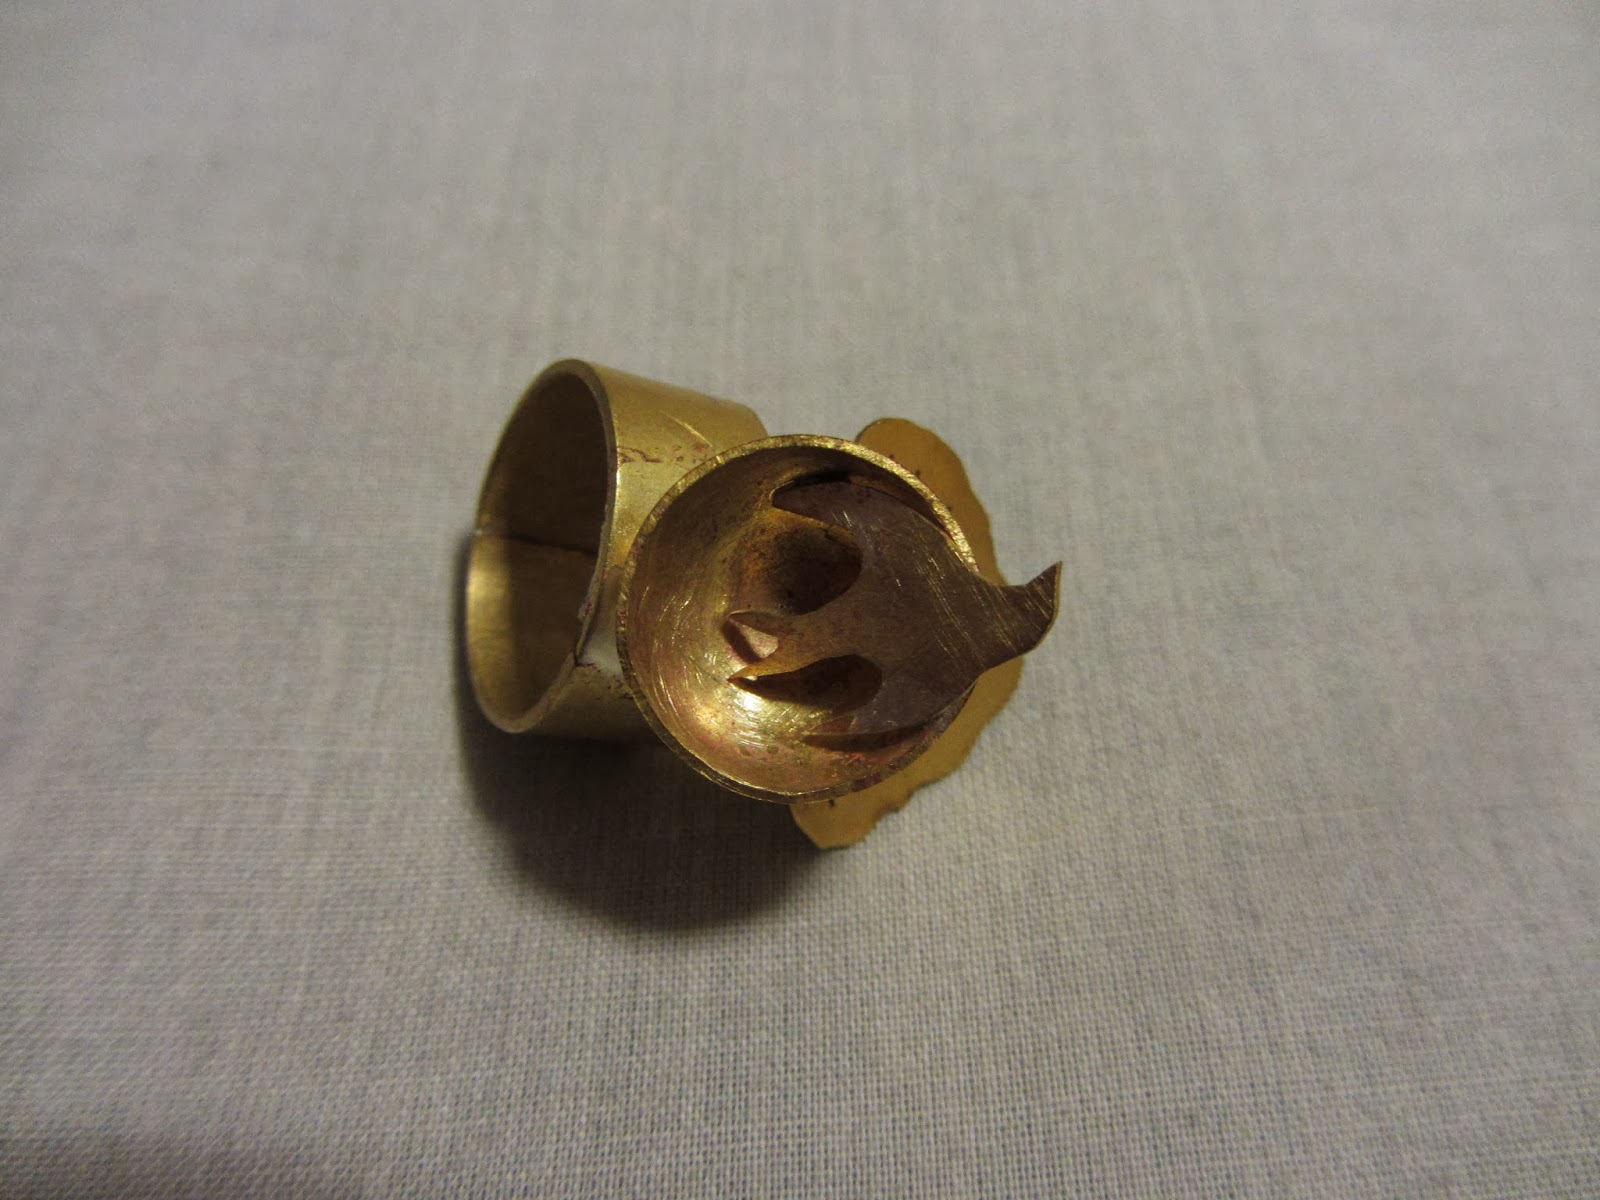
i decide my half sphere would be a birds nest, so i used a piercing saw to cut out the shape of a swallow. i first cut out the basic outline, then cut the 'v' out of it's tail. i had to be very careful on corners to make sure i didn't turn the saw too suddenly, which would snap the blade.
 I then cut out a tree shape, using cut lines to show the branches.

 I soldered all the pieces together, first soldering the tree to the inside of the ring, so it came out sideways, and then I soldered the bird into the nest. The next bit was quite difficult, because i had to solder the nest onto the ring, without disturbing any of the joints i had already soldered. i used the bricks to hold the ring and the nest in the right position while i soldered them.
 I quenched the whole ring and pickled it in the acid to take the flux off. This is the finished ring. I hope to polish it some more so the surface is more even and shiny.


Metalwork: making a ring and a half sphere.

Our first project in metalwork was a ring, with a half sphere on top, and another ornament or decoration of some sort. the first step was to cut a brass strip to the right size using a piercing saw. I used my finger circumference, then added the thickness of the metal multiplied by pi to get the length I would need for the ring to fit me. I then bent this around so the ends met, to be soldered together later. I then started on my half sphere. I drew a circle using a compass, and cut it out using the piercing saw.

I filed the edges to make them not as sharp. Then i had to shape the circle into a half sphere, or bowl shape. i did this using a doming block and punches. I moved from the bigger dents to smaller ones, so it got more domed as i went, and it got smaller.

I then soldered the edges of my ring together, making sure they were lined up well and had plenty of flux so the solder would flow in the right place. I then cleaned it in the acid to get all the flux off.
To make the ring round, I used a mallet and a ring stake to gently shape it without spoiling the texture of the metal or distorting it in any way.

Wednesday, 10 July 2013

Folded squares: Making jewellery

I started by setting out my copper squares with other types of squares to spell out words. I decided to use tin plate steel to make some squares, and I acid etched one side, so the inside was different when folded. I spelled out the word 'hide' using the braille alphabet
 I then decided to try some clay squares using the same folding method, but I found these were more curved because of the nature of the clay. I enameled the clay to show the cross pattern more clearly. I had to try to make the clay squares the same size as the metal ones, and this was fairly difficult because clay bends in a different way to metal, and it also shrinks during firing.
 I then decided that it would be better if there was a colour scheme, so it wasn't just random, so I decided to take the warm colours from the copper and brass, and use enamels in these colours on the clay squares.
 The clay squares on this one spell out 'unnoticed'. I stuck the squares together with masking tape to make sure they were lined up, before sewing them onto a fabric base. I stitched wadding inside the fabric, to make a padded base. I then sewed the edges together, to create a cuff.
 I tried to make the stitching as invisible as possible, so the pattern wasn't interrupted by the seam.


I used the same method to make two other pieces, a bracelet and a necklace, spelling out 'hide' and 'observe'


Monday, 13 May 2013

Wire work with ceramics and textiles

I wanted to include a textile element in one of my ceramic pieces, and also use metal to create a mixed media piece.I decided to use brass wire, and I made the wire frame curved, so as to be a statement necklace. I made the frame so the textile element could be woven through and sewn on to the wire. I used the large ceramic piece as the centre piece, and had two smaller ones on each side. I kept the colour scheme neutral so the ceramic pieces stand out and are the focal point. I pleated and stitched parts of the ribbon to add detail without taking the focus away from the ceramic pieces. I may add further textile parts to it at a later date, but I don't want to make it too busy and spoil the subtlety of it.


Tuesday, 2 April 2013

Metalwork: Making a brooch.

I wanted to make my piece of patterned copper 'wall' into a brooch, without just shoving a pin on it. I decided I wanted most of the pattern to be on the inside, so only the wearer knew it was there, and to keep the outside fairly minimal. I thought of what would be on a wall, like railings, and because the pattern was similar to patterns of paving slabs I have looked at, I also looked at what would be on floors, like footprints. I decided finally on drainpipes, because that would be a decorative way of attaching it to something, because a pin or a few pins could go into the pipes to hold it on. I also went out and did some observational sketches of how pipes fitted together, and how they were attached to the wall, to get ideas of how I could arrange the pipes on my brooch.


I decided to have one straight piece of pipe, and one bent, so I could have one long pin that would go all the way through the pipe, and not fall out. I soldered a bent piece of wire to the straight piece of pipe (it is solid wire not pipe because it doesn't need to hold the pin, and wire is easier to bend without miss-shaping it) and then made small loops from thinner wire, and used lead solder to join them on without melting the previous soldering.

 After polishing it in the tumbler, I super glued the brass pieces on so they would stay still while I was drilling, and centre punched each side of each brass piece so I knew where to drill.

I drilled the holes, then neatened them and made them a little bit bigger so the rivets would go through.

 The rivets are decorative on the other side, so it will still look nice when worn so that the main pattern is hidden.
I wanted the pin to go through the pipe, and hold on to the garment at both the top and bottom, so it would hold on securely.
 I used a piece of wire, and melted the end so there was a small blob, which would stop it going through the fabric. I also curved the wire slightly, so the tension would keep it held in the right place.