Showing posts with label metalwork. Show all posts

Sunday, 12 April 2015

Metalwork: Enamelling on copper


I decided to try using my hot shop colour powders on copper, as I know that copper and glasma have very similar coefficients of expansion, and so can be used together. The problem I was most worried about was it not sticking to the copper. to combat this I thoroughly cleaned the copper so there were no contaminants on the surface. I was right to worry, as my first attempt was unsuccessful, the enamel flaking off the surface soon after it cooled. I thought this was due to the copper building up a layer of oxide, and the powder stuck to that instead of the copper itself. I then thought that to combat this I could use borax flux to stop the oxide building up (flux is what keeps the metal clean and enables solder to stick to it). I first mixed the powder with water and flux and painted it on to the copper.
 I heated up the piece from underneath (to heat the copper rather than the enamel) and the flux bubbled up. I liked the effect this gave, as it moved the powder out of a flat layer and into a very interesting texture.
 I then tried putting the flux on and heating that until it bubbled up, then added the colour powder, this gave a more even layer, though it still kept an interesting texture I think these effects could both be used in future pieces.
I then used enamels that are designed for use in a kiln on sheet glass, which have a lower melting temperature. I textured the copper in the rolling mill then painted on the enamel and heated it with a blowtorch from underneath.


 These stuck without flux, and stayed where I painted them on, so were a lot more controllable, but not as textured as the powder pieces.


Monday, 10 February 2014

Metalwork: Making wire.

Wire is a very versatile material in metalwork,  and I have now learnt how to make my own wire the diameter and shape I want it. This means I can make the wire to suit the piece I want to make, rather than changing the piece depending on the wire. I started off with a rod of copper, about 4mm diameter and about 6cm long. I used the rolling mill to roll it down, making the diameter smaller and a slight diamond shape. This also made it longer because the metal was being squashed through the roller.

I then used a draw plate to make the wire thinner, and give it a square cross section. I decided to make it square because wire is generally round, and I thought square would be more interesting because it could be twisted to create different effects.
The end of the wire is a little bit chewed up because of the pliers I used to pull it through the draw plate, so this little bit is unusable, but could be made into something else or put in a scrap pile to melt down later.


Tuesday, 19 November 2013

Metalwork: Sinking a shallow bowl

Sinking is a method of creating a shallow bowl shape from a flat disk of metal, by hammering it against a dipped surface to shape it. I worked in concentric circles from near the edge to the centre, which stretches the metal in the middle and makes the dish shape.
this gives a good overall bowl shape, but leaves a very lumpy texture from the hammer.
once I was happy with the shape of my bowl and I had got it as deep as I wanted it, I started planishing it to create a smooth texture, but one which would still have hammer marks on. I used a round stake and  a flat, shiny hammer, which meant the marks it left were shiny and even.
I used the same method of concentric circles to do this, so it would be even and wouldn't be misshaped.


Monday, 14 October 2013

Metalwork: Soldering and decorating the ring

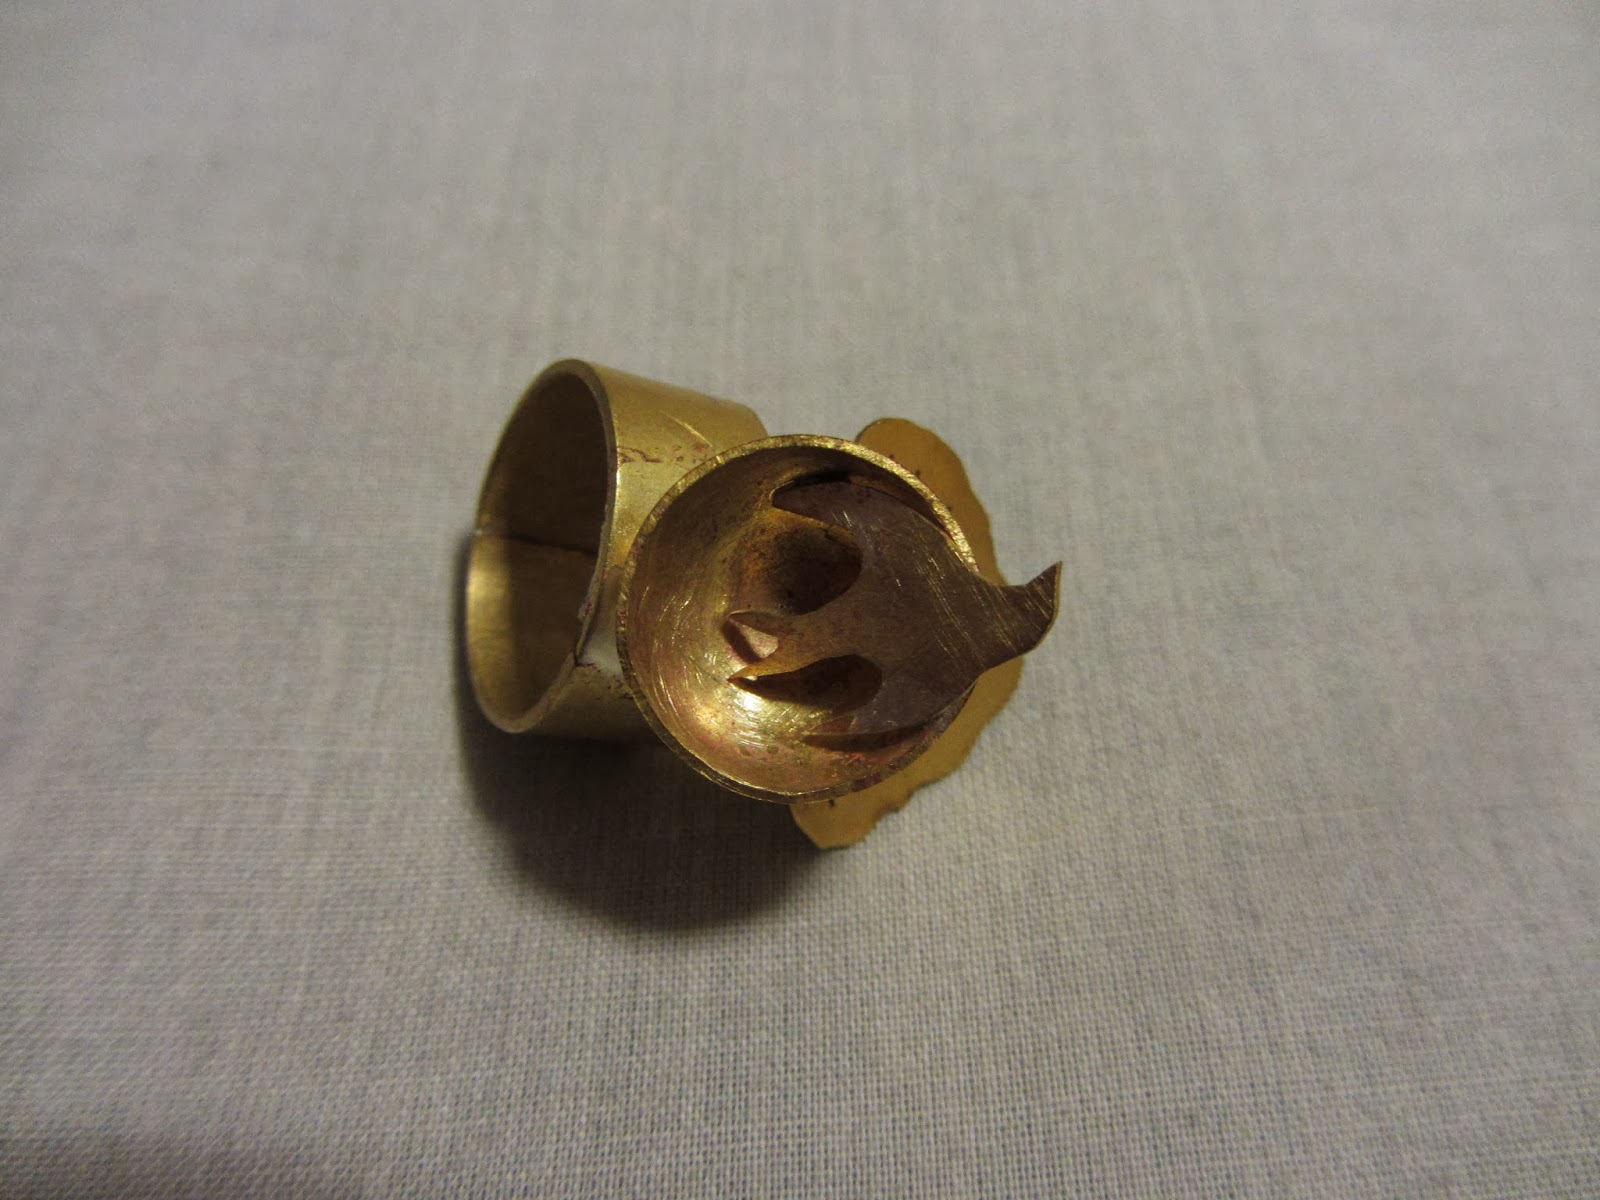
i decide my half sphere would be a birds nest, so i used a piercing saw to cut out the shape of a swallow. i first cut out the basic outline, then cut the 'v' out of it's tail. i had to be very careful on corners to make sure i didn't turn the saw too suddenly, which would snap the blade.
 I then cut out a tree shape, using cut lines to show the branches.

 I soldered all the pieces together, first soldering the tree to the inside of the ring, so it came out sideways, and then I soldered the bird into the nest. The next bit was quite difficult, because i had to solder the nest onto the ring, without disturbing any of the joints i had already soldered. i used the bricks to hold the ring and the nest in the right position while i soldered them.
 I quenched the whole ring and pickled it in the acid to take the flux off. This is the finished ring. I hope to polish it some more so the surface is more even and shiny.


Metalwork: making a ring and a half sphere.

Our first project in metalwork was a ring, with a half sphere on top, and another ornament or decoration of some sort. the first step was to cut a brass strip to the right size using a piercing saw. I used my finger circumference, then added the thickness of the metal multiplied by pi to get the length I would need for the ring to fit me. I then bent this around so the ends met, to be soldered together later. I then started on my half sphere. I drew a circle using a compass, and cut it out using the piercing saw.

I filed the edges to make them not as sharp. Then i had to shape the circle into a half sphere, or bowl shape. i did this using a doming block and punches. I moved from the bigger dents to smaller ones, so it got more domed as i went, and it got smaller.

I then soldered the edges of my ring together, making sure they were lined up well and had plenty of flux so the solder would flow in the right place. I then cleaned it in the acid to get all the flux off.
To make the ring round, I used a mallet and a ring stake to gently shape it without spoiling the texture of the metal or distorting it in any way.

Thursday, 30 May 2013

Textile and mixed media: repeated diamonds.

 I have been looking at Polly Binns and Ealish Wilson, who both use a technique similar to smocking, but on a very large scale. Wilson uses various methods of securing her fabric, including cable ties and different threads.
 I tried out the same method, using embroidery thread to secure my calico. I knotted each piece of thread and left the tails long for added decoration.
 I then thought about possibly adding pieces to the textile backing, in the holes, so that there are smaller pieces of pattern, inside the textile.
 I have decided I would like to try to make quite a large wall hanging, so I wanted quite a few diamonds, to put in various places in the textile piece. I made diamonds from both clay and metal, using punches, enamel, pewter casting and reticulation to make the brass crumple and make a texture. I also used stamps to decorate some of the clay ones. I then used seed beads to weave one.