Monday, 14 October 2013

Metalwork: Soldering and decorating the ring

i decide my half sphere would be a birds nest, so i used a piercing saw to cut out the shape of a swallow. i first cut out the basic outline, then cut the 'v' out of it's tail. i had to be very careful on corners to make sure i didn't turn the saw too suddenly, which would snap the blade.
 I then cut out a tree shape, using cut lines to show the branches.

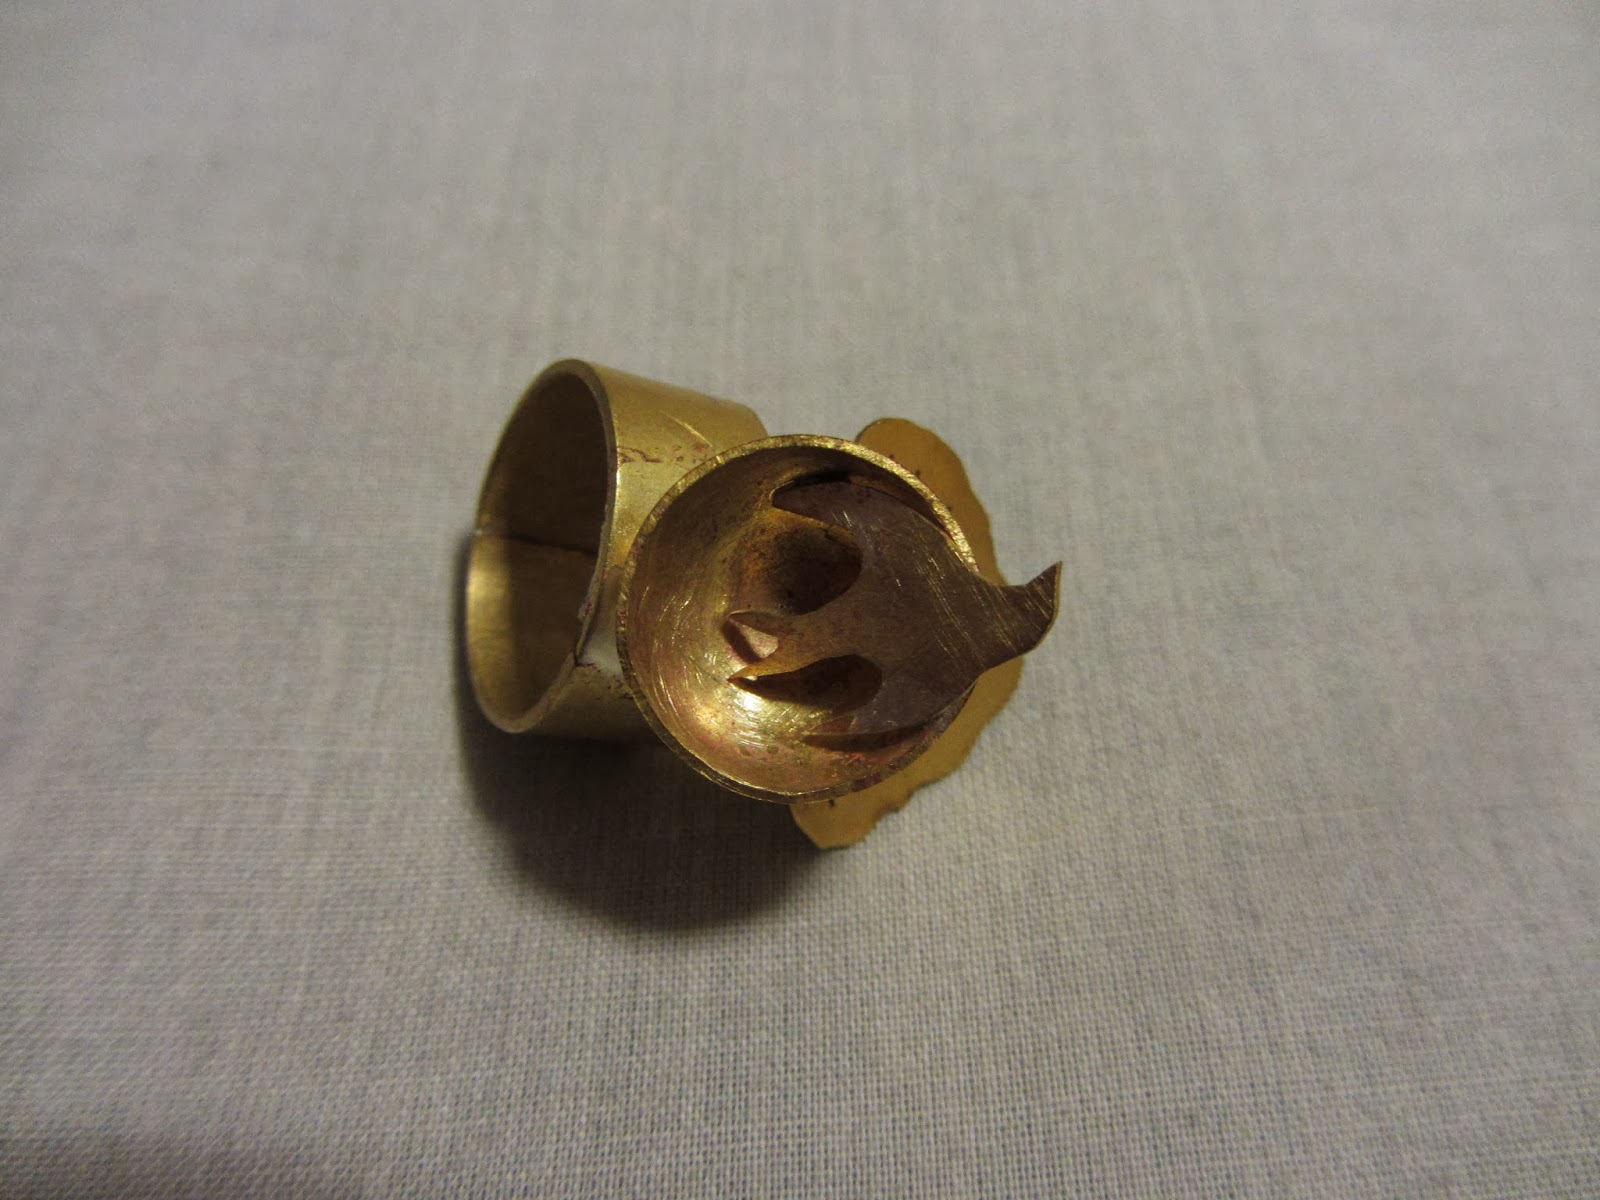
 I soldered all the pieces together, first soldering the tree to the inside of the ring, so it came out sideways, and then I soldered the bird into the nest. The next bit was quite difficult, because i had to solder the nest onto the ring, without disturbing any of the joints i had already soldered. i used the bricks to hold the ring and the nest in the right position while i soldered them.
 I quenched the whole ring and pickled it in the acid to take the flux off. This is the finished ring. I hope to polish it some more so the surface is more even and shiny.


Metalwork: making a ring and a half sphere.

Our first project in metalwork was a ring, with a half sphere on top, and another ornament or decoration of some sort. the first step was to cut a brass strip to the right size using a piercing saw. I used my finger circumference, then added the thickness of the metal multiplied by pi to get the length I would need for the ring to fit me. I then bent this around so the ends met, to be soldered together later. I then started on my half sphere. I drew a circle using a compass, and cut it out using the piercing saw.

I filed the edges to make them not as sharp. Then i had to shape the circle into a half sphere, or bowl shape. i did this using a doming block and punches. I moved from the bigger dents to smaller ones, so it got more domed as i went, and it got smaller.

I then soldered the edges of my ring together, making sure they were lined up well and had plenty of flux so the solder would flow in the right place. I then cleaned it in the acid to get all the flux off.
To make the ring round, I used a mallet and a ring stake to gently shape it without spoiling the texture of the metal or distorting it in any way.

Tuesday, 8 October 2013

Glasswork: using cold glass.

This week in glass we were doing more work using cold glass. I designed and made a tile from two sheets of glass, with copper wire and copper foil inside for the decoration. I wanted to stay with the nature theme so I cut leaves out, and then used the copper wire and small pieces of copper foil to make it look as though it was windy, like the leaves were being blown about.


i washed and dried the glass sheets carefully, so as to not leave any marks on them, because the marks would stay there through the firing.
The tiles were put in the kiln on ceramic fibre paper, and were fired up to 810 degrees, so the glass sheets were fully fused together.

We then filled the moulds we made in the last session. for the half-mould, I filled it up to about twice its depth, because it needs more glass than it looks like it should to make up for the air in between the glass pieces.
these were then put into the kiln to fire, so the pieces of glass would melt and fill the mould. 

I weighed out the glass for my rose mould, using a glass:wax ratio of 2.55:1. my wax weighed 87g, and so i calculated that i would need 221 grams of glass. I weighed out 225, in case some of the glass stuck to the inside of the reservoir instead of all flowing into the mould. These were also put into a kiln, on ceramic fibre paper in case any of the glass overflowed and dripped onto the kiln floor.


Sunday, 6 October 2013

Glasswork: Steaming and carving the moulds

To create the mould for my rose, i had to get all of the wax out of the plaster to make the cavity i would then put glass in. I did this by putting the mould on top of a steamer (the same kind you use to take wallpaper off) which melts the wax, because steam is 100 degrees. the heat makes the wax liquid, which then runs out of the mould. this is one reason not to have any pieces sticking out so the wax can't get out, and the glass can't get in. any leftover wax could distort the shape and discolour the glass, so it is important to make sure there is no wax left in the mould.
 The wax came out of the mould and solidified underneath as it cooled.
 when no more wax was coming out of the mould, I flushed it out with hot water from the kettle, then cold. the hot water melted any remaining wax, and the cold water made it solidify again and float to the surface to be poured away. I repeated this until no more wax came out. I then put it in the drying cupboard.

I then carved into a plaster block to create a negative mould. i had to make sure it was deep enough to not snap if it were cast in glass. i used a leaf as my design, but simplified it slightly to make it easier for the glass to get into all the corners.


i carved the veins, so these will be stuck out when i cast it in glass.

Glasswork: Organic form lost wax casting

 In our induction into glass, we started to process of making a lost-wax mould. we each got given an egg shape on a sprue, and could carve into this, or add bits to it, to create an organic form (still working within the theme of nature and culture) I decided to try to make a rose shape, and I did this by adding pieces of spare wax to make petals. I did this in a way that I think the glass would be able to flow through the mold (the sprue will end up at the top)


once I finished the rose, I weighed it to calculate the amount of glass I would need to use to fill the mould later.
I made a clay cone shape about the same size as the flower, and sat my flower on top of it. this will create the reservoir in the mould, to hold the glass before it flows down into the mould.

i decided to attach them together using a cocktail stick because it didn't feel very secure just sitting on top of the clay.
i used boards to create a box around the rose, making sure there was about 1.5cm gap around the edges. i secured the boards in place with clay, and then tied around it with string to make sure it wouldn't collapse when the plaster was poured in.

i mixed plaster and silica together with water, until it was the consistency of single cream. it had a slight texture to it because of the silica. i poured it in around the side of the rose, so as not to damage any of the petals.
once the plaster had gone off and was cooling down, I took the walls down. I also removed the clay, to leave just the plaster and wax. I left this on the side to dry a bit more, to steam the wax out another day.

I etched my initials into the side of the plaster while it was still soft so I didn't get it confused with anyone elses.

Drawing: Using mixed media.

This weeks session was linked to last weeks, in that we were using last weeks drawings to create these ones. I chose a small section of my shoe mountain drawing, and drew it a lot bigger on a piece of black paper. I then used mixed media (wire, paint, charcoal, chalk, masking tape, wood, fine liner, cutting out, string) to pick out details and make it more 3D.
These are some close-ups of the drawing.


I drew with coloured fine liner on the blocks of wood, as a contrast to the very big black and white marks the rest of the drawing is made of.


I enjoyed doing this and experimenting mixing media I haven't used together before, but I did get very messy.