Showing posts with label ink. Show all posts

Sunday, 16 December 2012

Design visualisation: observational drawing and modelling.

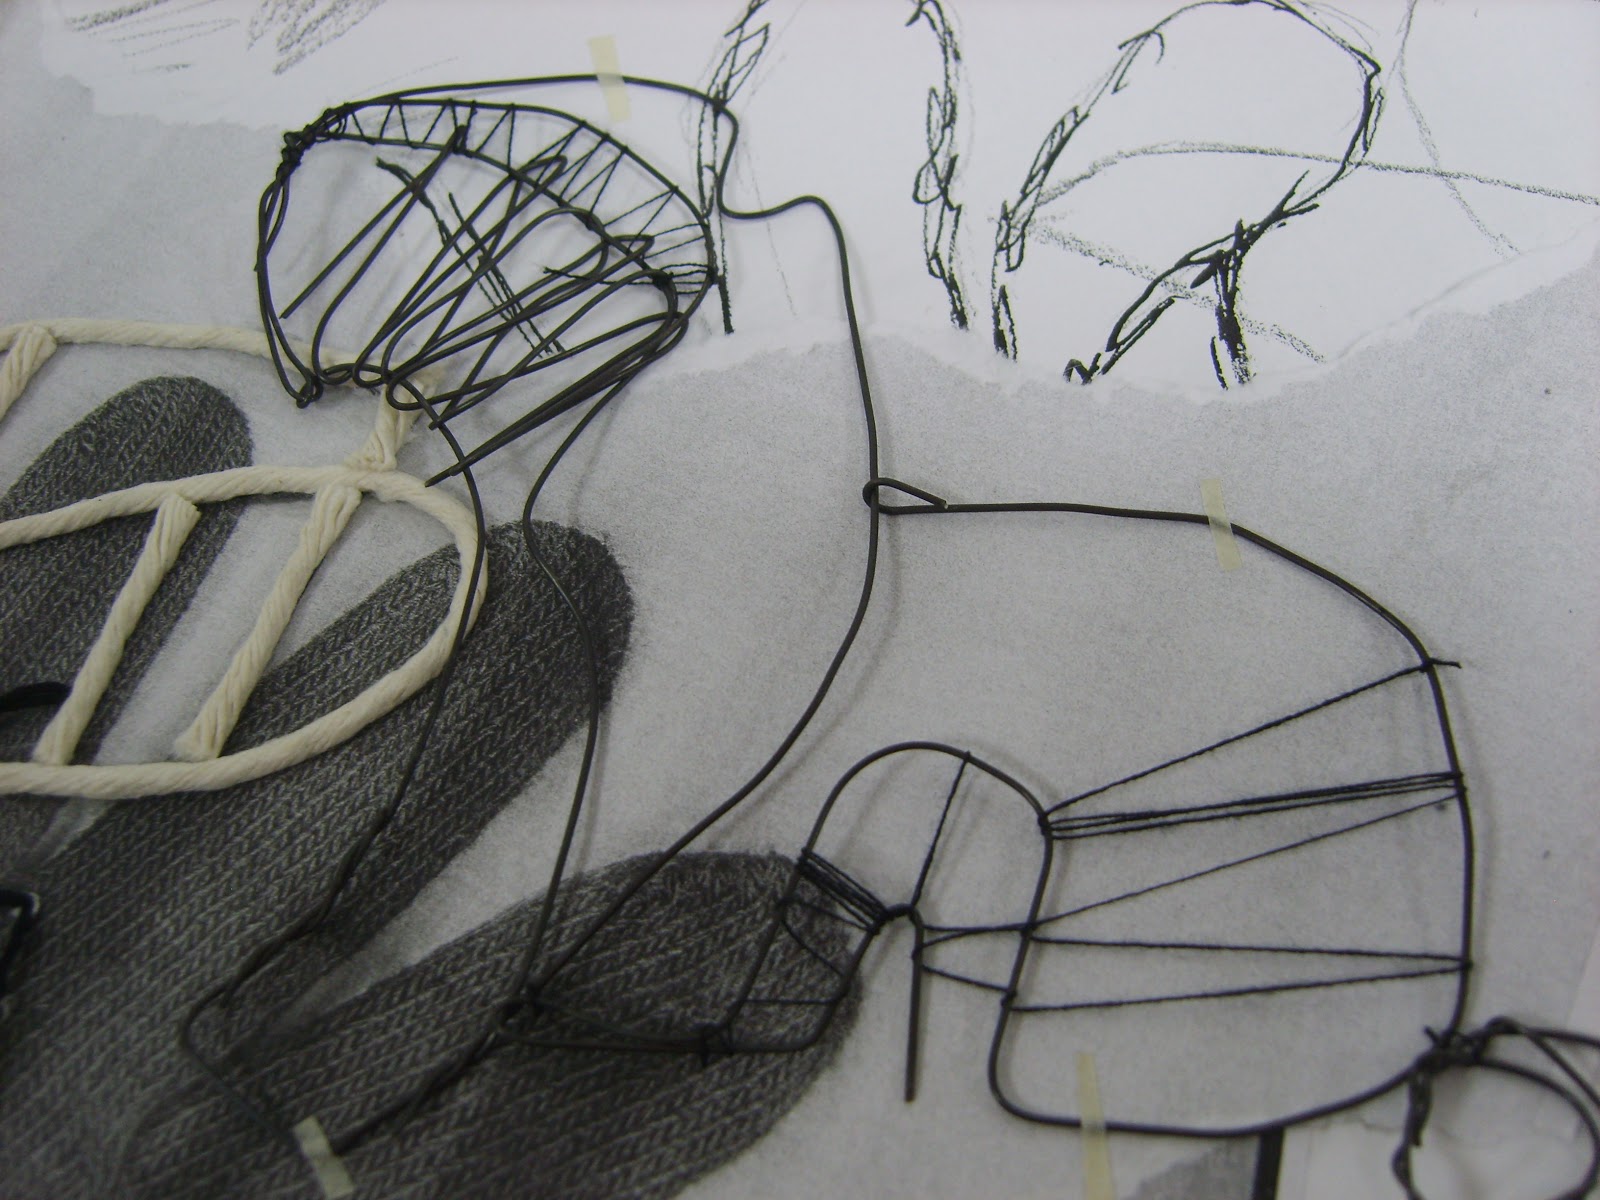
I decided to use a glove as the base for my observational drawing, to link with my theme of trace elements. A glove is often something people lose without noticing, if it falls out of a pocket, and it is a trace of the person who has been there.


I started off by using a graphite stick and pencil to do some quick sketches of the glove, in various different sizes and positions. I then used ink and collage to work into my drawing, to highlight interesting patterns and shapes.
I also did some separate quick drawings, to try to capture some of the different tones and shadows in the glove. 

After this, I started picking out some of the interesting patterns and shapes to make in wire. I found it difficult to bend very tight angles in the wire so some parts were more curved than I hoped they would be.

I then started to use black thread with the wire to create different thicknesses of lines, and some sharper angles. Some of the wire bits didn't look at all like a glove, but I found this was a good way to generate ideas from everyday objects, that could be used for jewellery or a printed pattern.

  After this, I started using collage, string, masking tape, sewing, and photocopies of the glove to create small object, taking ideas from my first drawing.


Saturday, 15 December 2012

Design visualistation: Observational drawing and modelling.

 For observational drawing, we were focussing on organic forms, so I chose this item, which I guessed was some sort of fruit, because I liked the repetitive nature of the surface,and the fact it is not one shape, but lots of little shapes that join together to make a whole.
 I used paper and masking tape to create cone shapes, and cut of the tops to emulate the shape of the fruit. I then used the cut off pieces to make smaller versions of the cones, and cut their tops off too. I attached them together with wire and thread.
 I then thought of using thread to draw with, so I stitched a simplified outline of some of the detail. I think this is quite effective, and would make a good pattern to repeat and use as a textile print or wallpaper.
 I used a barbecue skewer and ink to do a line drawing of the whole object, which created very thin lines and quite expressive lines because I was holding the skewer near the end.
 This drawing is a lot bigger, I wanted to show the end of it, not the side. I quite liked using the chalk, but it was hard not to smudge it when I was drawing other parts.
I think this one is my favourite drawings, it is a drawing of my larger paper model (top left corner), so I collaged some of the same paper onto the drawing, and also used chalk and ink to create the shading. I did the drawing on top of tissue paper, so there was a texture to the background, and I think all of this together makes it a very successful drawing.

Sunday, 11 November 2012

Textiles: monoprinting


Mono printing was one of the ways we looked at to apply pattern. I also used collage under the mono prints  For this one I used red and grey ink, over the top of a collage basic fish shape. I also used masking tape to create voids in the lines of ink

For my next one, I used scrap paper to block off the llama shape from the red and grey ink. I think I used too much ink on the plate because it printed onto the parts that I hadn't drawn onto, but I think this was a good effect because it made random shapes in the background.

I then made one using red, orange and grey, and it had quite a patterned design. my favourite part of this one is where I have used red ink after the grey to fill the gaps in the grey pattern.

My last one was more simple, I used less ink so the background would be plain, and just used red and orange so it wouldn't be too busy. I think this is very illustrative, and I like the simplicity of just having lines, with no shading or tone.

Overall, I really enjoyed the mono printing, but it was difficult because I wanted to lean on the paper, but this would have transferred onto the design, so I had to be very careful.


Thursday, 1 November 2012

Textiles: Surface pattern.


In textiles, we focused on surface pattern and colour, rather than fabric or garments. I liked experimenting with mixed media and texture such as masking tape and stitching, and I liked the methods we used to get interesting patterns. on the first strip of paper, we chose a part of the still life in front of us, and used ink to draw the negative spaces. We then turned the strip upside down, and drew the same part of the still life. I liked this because the ink created very interesting shapes, and they did not match up with the drawing on top. In this piece, I used ink, oil pastel, emulsion paint, chalk pastel, netting and thread. I also sprayed on bleach, to change the colour of the ink.

On my second piece, I was focusing on just one object. I started with a masking tape outline, then turned the paper by 90 degrees and used a chalk pastel to draw the object bigger. I carried on turning the paper around and changing media, And I think this gives a very good effect, capturing the object without just drawing it. I think this worked well because the object I chose had a very patterned texture, so the finished work has very detailed patterns and interesting lines. I think these could both be made into a repeating pattern, to use as something like wall paper or wrapping paper, or a fabric print to use on a garment.
 I then moved on to smaller pieces, and made a collage background from different papers, and part of a photocopy of one of my larger pieces. I then stitched a strip of ink dipped fabric on, using pink stitches. I stitched it so the fabric went from the top to the bottom of the paper, and the stitches went across. I then added more thread, in a wavy line, and some pleated paper.
 After I had done the pink stitching on my first small piece, I noticed the back had some very interesting marks, so I photocopied it and made it the background for my second small piece. I then used parts photocopied from one of my bigger pieces, and stitched onto the background with yellow, green and blue thread. I used all different sized stitches, then glued down the long ends of the thread down.
I really liked the bold stripes on the paper, so I put it with the inside of an envelope, so the large stripes contrast with the small repetitive pattern. I used a strip of fabric going diagonally across, and different stitches on top. I tried to stick to a fairly limited colour palette so it wasn't too over-complicated.

Thursday, 20 September 2012

Indian Ink

 The first drawings are done in graphite stick, to try to be freer and more sketchy. We then moved on to indian ink, using strips of card to draw with, so smaller details were done with the very edge of the card, and shading and larger parts with the flat part. I was quite pleased with my shading by the end. I like the semi-transparent nature of the ink because you can go over it to get darker tones and shadows but it also fades into light so there's a good range of tones from just one type of ink.